
Chapter 11
Hands, Body & Posture
The three contact points that decide every shot before you strike.
Body posture and stance
A shot is decided before the cue moves. If your body cannot hold the same shape twice, your aim is a guess that happens to be right sometimes. The stance has one job: park your eyes, shoulder and cue on the shot line and keep them there while the arm swings.
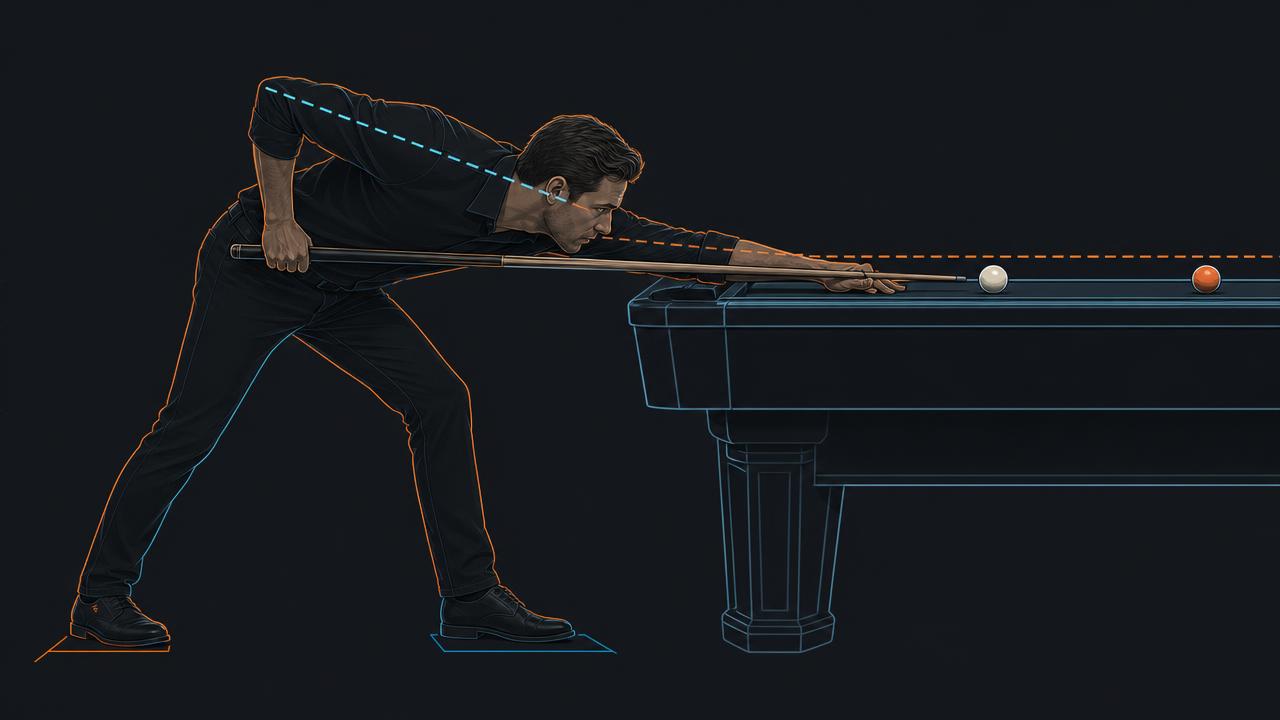
Build it in the same order every time
- Stand behind the ball and pick the contact point before you move a foot.
- Put the rear foot on the shot line extended, turned out 15–30°.
- Step the front foot 20–30 cm forward and slightly across, knee soft.
- Lower from the hips (not the waist) until your chin is 8–12 cm above the cue.
- Only now take practice strokes — never re-aim once you are down.
Checkpoints you can feel
- Weight — roughly 60/40 rear to front, both knees unlocked.
- Eyes — dominant eye within 5 mm of the vertical plane of the cue.
- Head height — lower for touch shots, slightly higher for power.
- Stillness — head and bridge frozen until the cue ball has left.
Snooker players stand narrower and lower; American pool players stand a little taller with more freedom for power. Both are correct — what is never correct is a stance that changes between shots.
Bridge hands: four shapes
The bridge is the rifle rest. It has to hold the cue at a fixed height, on a fixed line, without gripping it. Four shapes cover every position you will ever face.
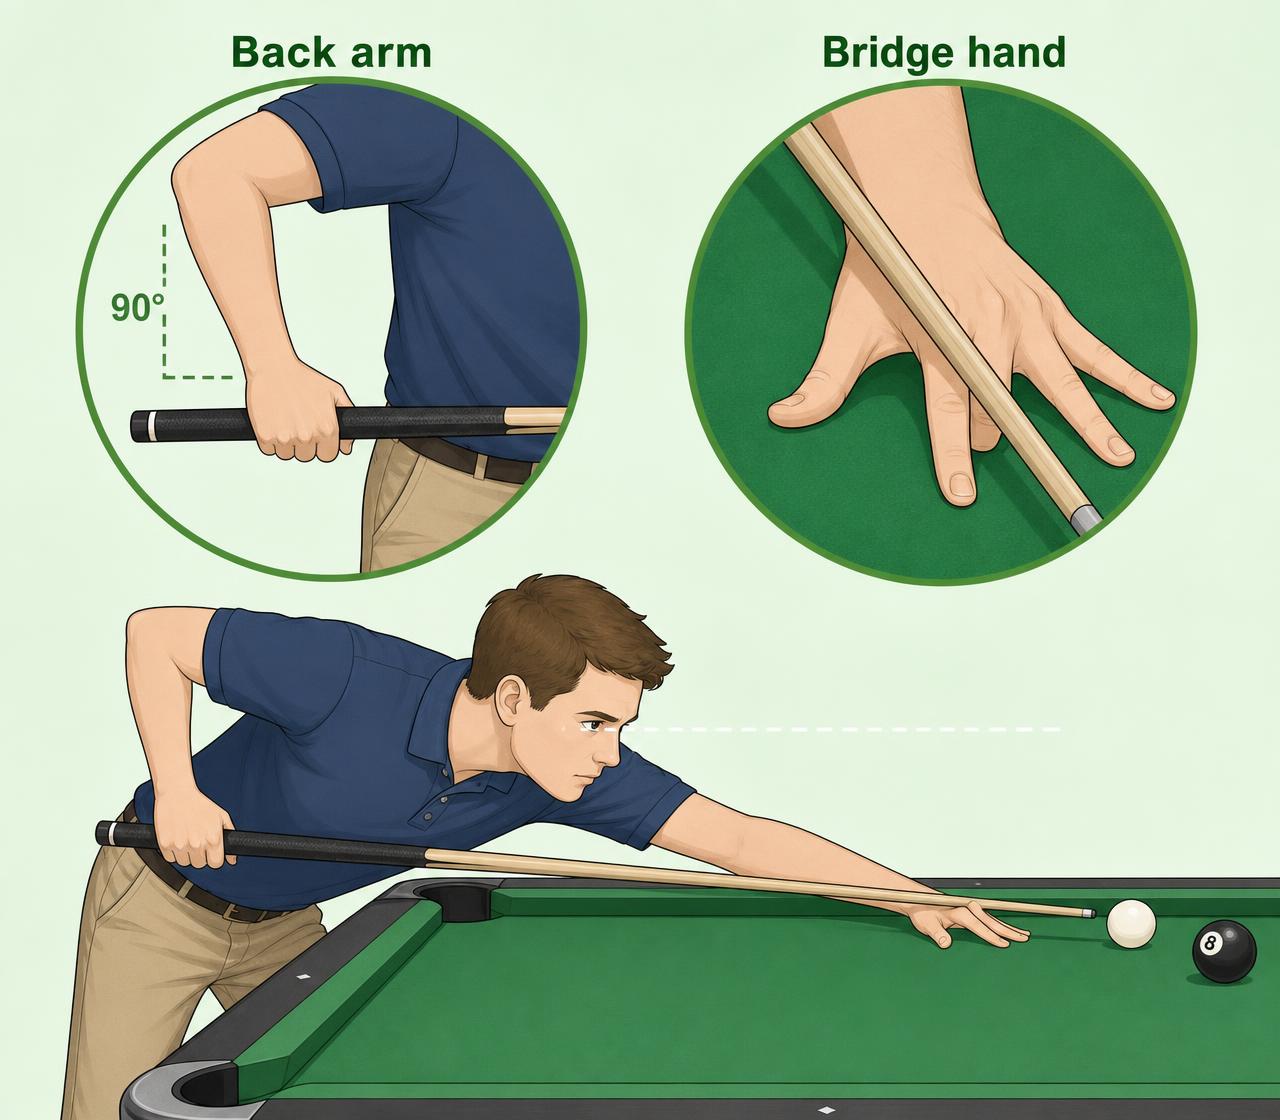
- Closed bridge — index finger looped over the shaft. Locks the cue for power breaks and heavy draw where the tip must not wander.
- Open bridge — fingers spread, thumb raised to form a V groove. Best visibility, the default for most shots and for anything with soft touch.
- Mechanical bridge — the rake head resting on the cloth, cue in one of its notches, back hand palm-up over the butt. Use it whenever the shot is out of reach.
- Rail bridge — hand over the cushion, fingers gripping the rail, cue pressed into the web of the hand. Keep the cue as level as the rail allows.
- Elevated bridge — fingertips high on the cloth, wrist raised, cue steep over an interfering ball. Shorten the bridge and slow the stroke.
Length and pressure
Bridge length is 20–25 cm for normal shots, 10–15 cm for delicate safeties, 30 cm+ for a break. The cue should slide through the bridge with no friction; if the shaft squeaks or drags, you are gripping instead of resting. Spread your fingers wide enough that the heel of the hand carries the weight — a tall, tense bridge collapses under a firm stroke and drops the tip below the centre of the ball.
Use the mechanical rest without shame when the shot is out of reach. Stretching turns a good stroke into a lunge.
Grip hand and the stroke
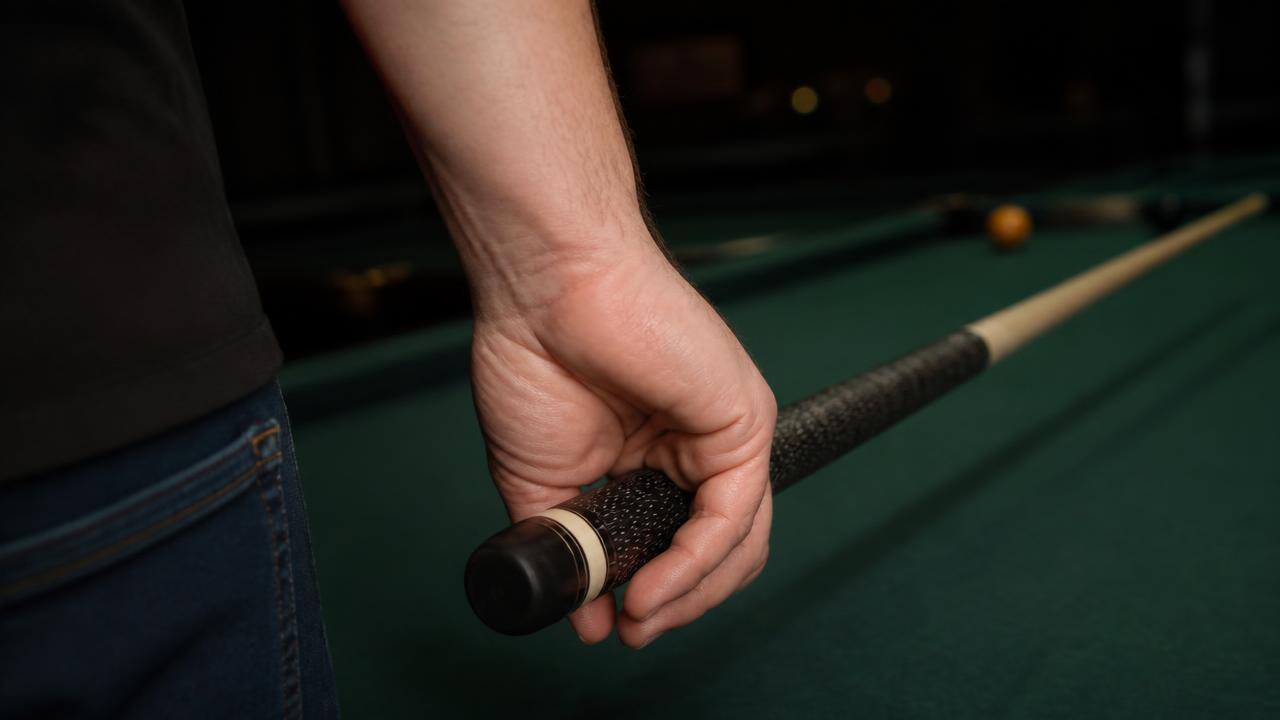
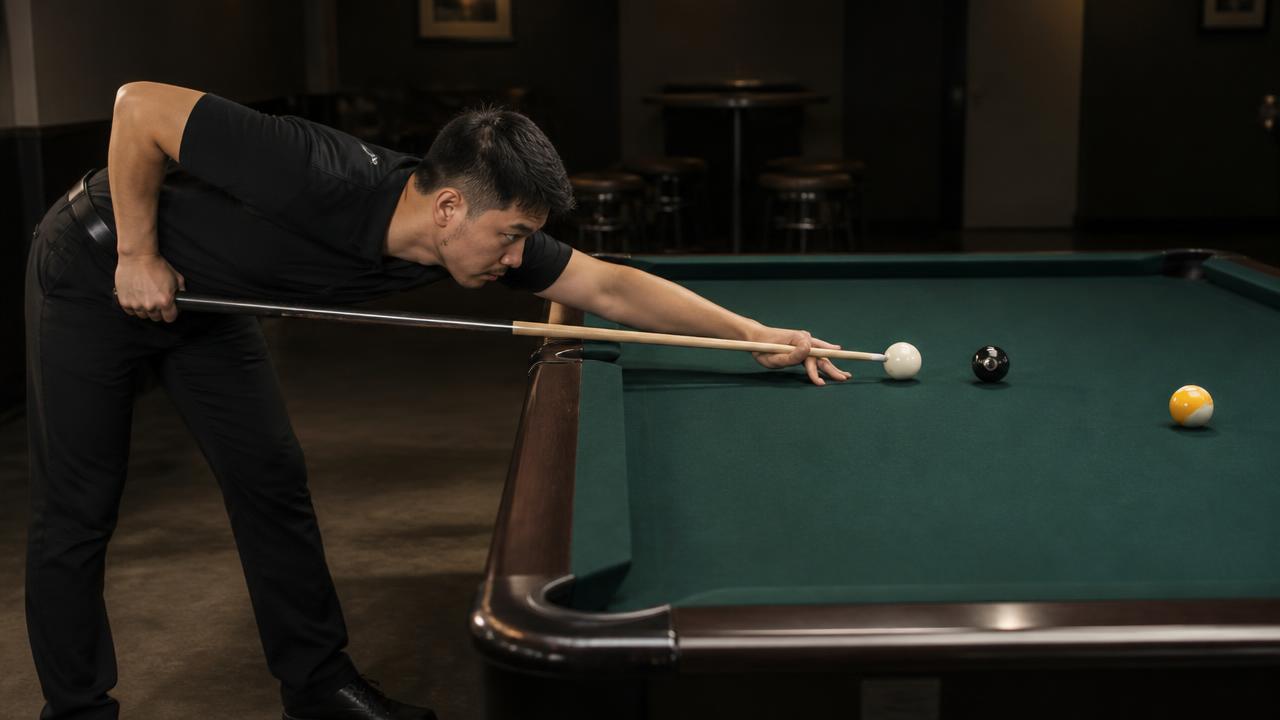
The grip hand does almost nothing, and that is the skill. Its only task is to let the forearm swing like a pendulum from a still elbow so the tip arrives where you aimed it.
How to hold the cue
- Cradle it in the first two fingers and thumb; the back fingers only follow.
- Pressure of holding a small bird: firm enough not to drop, loose enough not to hurt.
- Wrist neutral — no cocking left or right, which steers the tip off line.
- The forearm hangs vertically when the tip is at the cue ball.
The four phases
- Address — tip a few millimetres from the cue ball, on the exact contact point.
- Feathering — two or three slow rehearsals at the pace of the real shot.
- Backswing — slow, to the length that matches the power required, then a brief pause.
- Delivery and follow-through — accelerate smoothly through the ball, finishing 10–15 cm past the address point.
Faults nearly always come from the grip tightening in the delivery: the elbow drops, the tip rises, and a centre-ball stroke becomes accidental top spin. Practise with the cue over a rail cloth line and check that the tip returns to the same point ten times in a row before adding power.